Creating Aesthetic Travel Compilations with CapCut Desktop Video Editor
Table of Contents
- Why Use CapCut Desktop Video Editor?
- Planning Your Travel Compilation
- Step-by-Step: 5 Main Operational Steps in CapCut Desktop Video Editor
- Step 1. Import Your Media
- Step 2. Drag Clips to the Timeline and Trim
- Step 3. Add Transitions and Effects
- Step 4. Add Music and Sound Design
- Step 5. Export and Optimize for Sharing
- Aesthetic Enhancement: Color Grading and Filters
- Adding Text and Captions Creatively
- Final Thoughts
Travel isn’t just a collection of destinations, it’s a collection of memories, feelings, and frames that constitute your experience. And in today’s digital age, one of the better ways to relive those memories is through a beautifully edited video compilation.
Whether you’re sharing your adventures with the world on social media or keeping them close for your own sake, how you edit your travel clips together can be the deciding factor. CapCut Desktop Video Editor, the powerful yet user-friendly video editing software, is becoming increasingly popular among creators for exactly this reason. For those narrating their travel stories, the built-in text to speech feature offers a convenient way to turn written captions into spoken voiceovers, saving time and adding a polished touch.
Here, we’ll take you through creating stunning travel montages using CapCut Desktop. From setting the mood with a soundtrack to adding seamless transitions and color grading, here’s everything you need to know.
Why Use CapCut Desktop Video Editor?
CapCut started life as a mobile app widely used by TikTokers, but its desktop version has evolved into full-fledged editing software. It offers a range of professional-level features yet retains the ease of use that does not intimidate new users. You can trim, cut, stack videos, add filters, add captions, and include cinematic transitions, all for free.
As opposed to more resource-hungry programs like Adobe Premiere Pro or Final Cut Pro, CapCut Desktop Video Editor is light on your computer and easy to master. And the best part? You don’t need to know anything about video editing to create something beautifully visually appealing.
Planning Your Travel Compilation
Before diving into CapCut, it is helpful to start with a bit of planning. Think about what your story is. Is your video showcasing the bright streets of Tokyo or the serene peacefulness of Iceland’s scenery? Having a mood or theme in mind will guide your edits later.
Sort your clips by place, mood, or time of day. Only take the most interesting segments—remember, sometimes less is more when creating a video that someone will actually sit down and watch from beginning to end. If you’re short on time, CapCut’s tools can function like an AI video generator, automatically suggesting cuts, transitions, and even matching music that fits your footage’s mood.
Step-by-Step: 5 Main Operational Steps in CapCut Desktop Video Editor
Below are the key steps to creating your travel video montage with CapCut Desktop Video Editor:
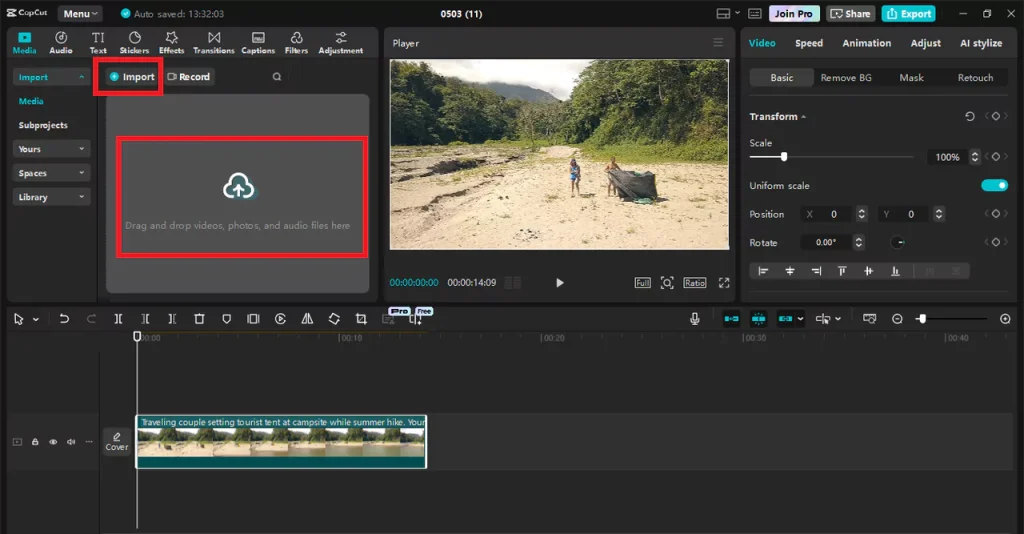
Step 1. Import Your Media
Once you have launched CapCut Desktop, importing your footage is the initial step. Navigate to the ‘Media’ tab and drag and drop your background music, photos, and video clips into the project bin. You can also import it directly from your phone or camera.
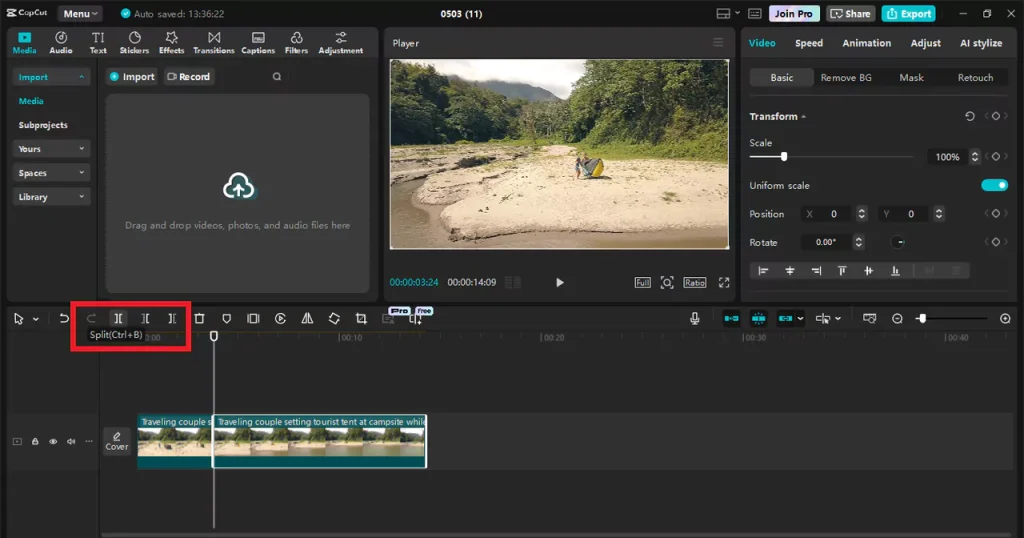
Step 2. Drag Clips to the Timeline and Trim
After importing, drag and drop the selected clips onto the timeline. Apply the split feature (scissors icon) to cut away the redundant portions. Keep your montage brief—1–3 seconds for each clip unless absolutely necessary otherwise. Reorganize the clips within the timeline by dragging. CapCut supports multi-layer editing, so overlapping clips or placing transitions is possible too.
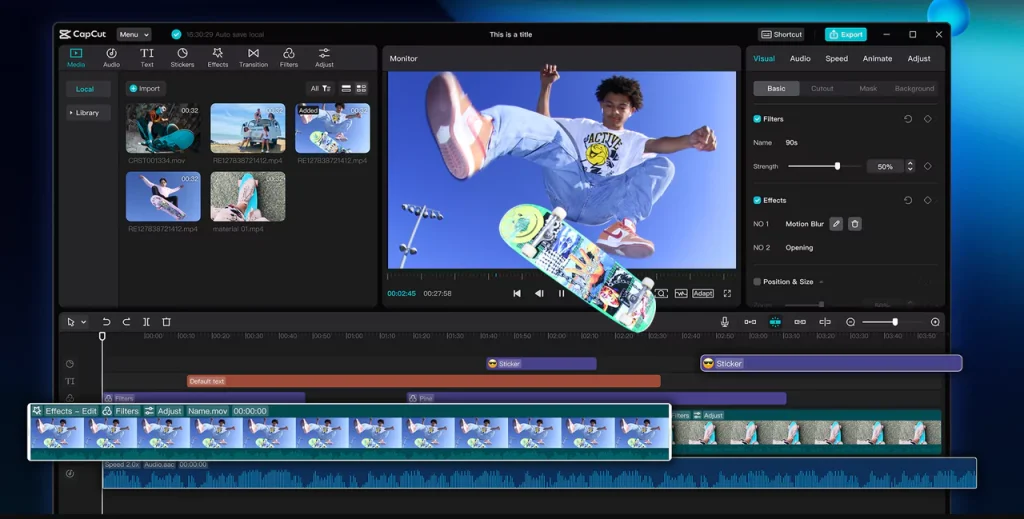
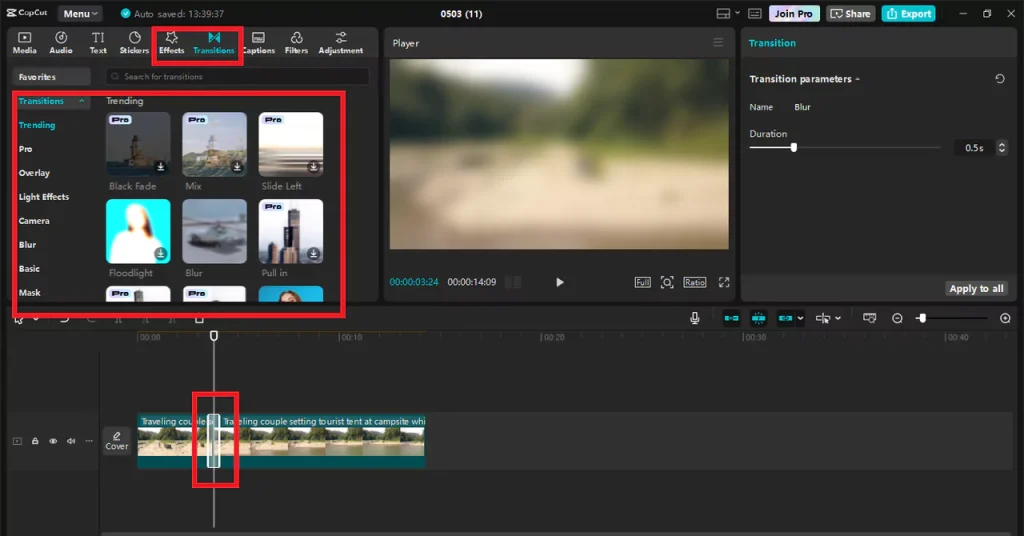
Step 3. Add Transitions and Effects
Smooth transitions can elevate your video’s appearance to the next level. Choose the ‘Transition’ tab to apply dozens of options—everything from subtle cross dissolves to dramatic zooms or wipes. Choose transitions based on your mood. For a relaxed travel ambiance, soft fades and cinematic light leaks are ideal.
CapCut also enables you to apply motion effects, camera shake, or throwback filters for some personality. Don’t overdo it, though—consistency is what keeps your appearance consistent.
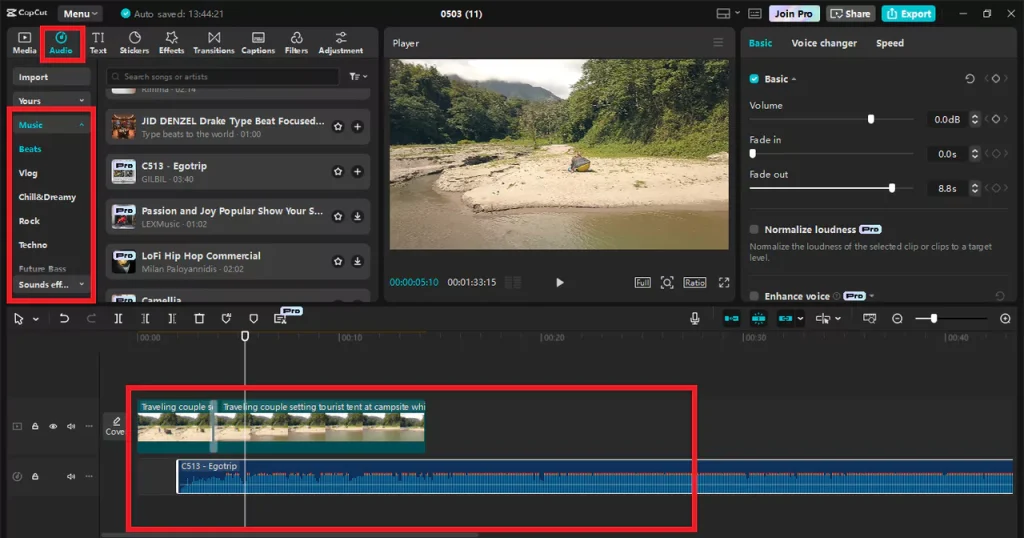
Step 4. Add Music and Sound Design
Music is the soul of any travel compilation. Go to the ‘Audio’ tab and browse CapCut’s library of royalty-free music, or import your own track. Once you’ve selected your song, drag it into the audio timeline and adjust it to match the rhythm of your video.
CapCut also has beat detection, which makes it easier to sync visual elements with music. To introduce emotional depth, try syncing pivotal video moments (like a mountain reveal or cityscape) to the beat drop or chorus of the music. You can also experiment with CapCut’s voice changer to create playful or stylistic variations in your audio narration or ambient effects.
Also, utilize ambient background noise—waves, city noises, birds that add meat to your scenes without dominating the audio.
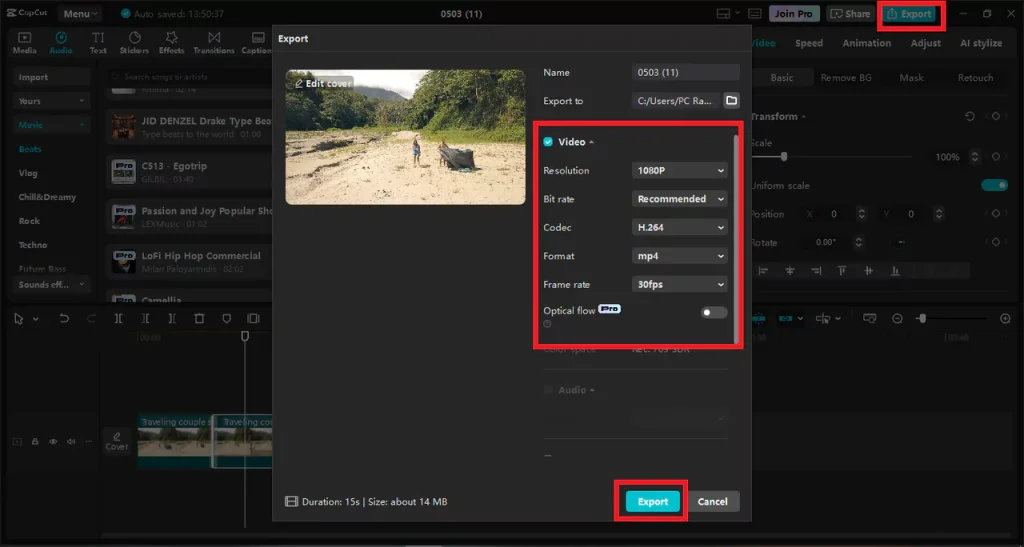
Step 5. Export and Optimize for Sharing
Once you are happy with your edit, export it. In the top-right corner, tap the ‘Export’ button. CapCut offers you the choice to adjust resolution (up to 4K), bitrate, and format. For posting to social media, an MP4 at 1080p will usually suffice and is very compatible. You may also export presets for platforms like YouTube, Instagram, or TikTok so that your video will be optimized for the correct dimensions and file size.
Aesthetic Enhancement: Color Grading and Filters
One of the standout features of CapCut is its color grading. Go to the ‘Adjustment’ tab and tweak brightness, contrast, saturation, temperature, and so much more. This is where you can decide the mood of your video—warm and dreamy, cool and cinematic, or whatever else you can imagine.
CapCut also includes preset LUTs and filters, which will give your footage that professional-level sheen instantly. Use them judiciously, not to overdo it.
Adding Text and Captions Creatively
Adding text to your travel videos is not only convenient, you can do it creatively too. CapCut includes excellent text toolkits with nice font sets as well as animation-friendly text templates. You can use them to:
- Add each location (e.g., “Lisbon, Portugal” in bold serif over a drone shot).
- Add quotes or travel reflections.
- Add timestamps or dates for that nostalgic feel.
Make sure your fonts and positioning don’t overwhelm the video. Subtle motion effects on text can add a modern feel without being distracting.
Final Thoughts
Compiling gorgeous travel montage highlight reels need not be challenging or expensive. CapCut Desktop provides you with all the tools you require to turn your raw vacation clips into movie-quality highlight reels. The process, importing your clips to finishing them off, is surprisingly fun, even therapeutic. And the good news? You don’t need to become an editing guru to achieve this.